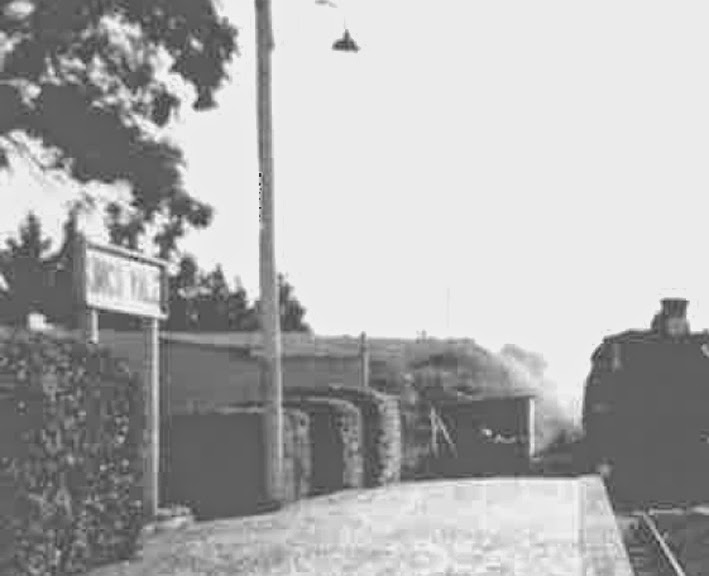
Kingsvale, NSW 1963

Kingsvale, NSW 1963
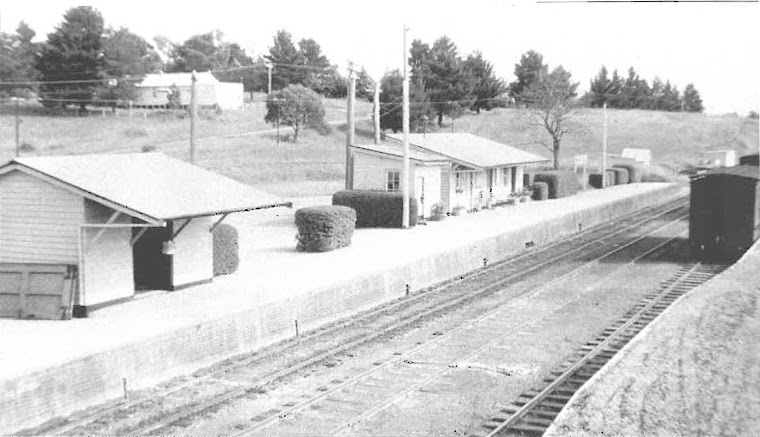
A view of Kingsvale station, looking north towards Cowra c1963. Courtesy Ken Ames, "From Grease to Gold Braid".

Monday, 28 April 2014

The bog blog

Hi all
I have been making steady progress with Kings Vale recently, adding a few fiddly details to the station which really lift the appearance.

With a few days off over Easter and Anzac Day, the main project has been the construction of a C1 toilet, which was situated at the Cowra end of the platform.

From the photos I have, this structure is something of a mystery.  It is definitely a toilet block of some kind for the gentlemen, but the design is difficult to discern from the photos.  It looks like it might have a skillion roof , but without many details I am using a bit of modellers' licence and pretending it's a C1 standard building.  I like the style of the C1.


Since there are few signals protecting Kings Vale yard, I don't think a lamp room separate to the station building would have been justified.  The building doesn't look big enough to be a C2.

So using the Data Sheet for "C" type toilets and lamp rooms, I started crafting this small structure.  Well, it's quite small, but not particularly simple - it took about a week from start to finish (of about an hour or two of effort per day).  I have really enjoyed doing this bit of styrene scratchbuilding.  I love working with Evergreen strip and the results are very pleasing so far.

Here is the back wall.  Most of the louvres are blind, but I wanted the ones adjacent to the doorway to be "real" so that the louvres look right from both sides.  Same applies to the framing.  Elsewhere, I have not built a frame but just backed the Campbell's corrugated aluminium with styrene sheet.


The floor on the left, with the frame for the screen, rear wall, front wall and two ends.


After airbrushing of the sides and ends and picking out details in mid- and dark stone.


I had some near disasters with the weathering, thinking I had stuffed up a half-decent paint job.  But weathering is pretty forgiving, particularly if you are patient in waiting 24 hours for the paint to dry before trying to fix it.  Overall I think the result is ok, and will look even better when it's been added to the platform and surrounded by a few weeds.


The next exciting instalment will be along soon!

Cheers

James


Sunday, 29 December 2013

Demondrille layout planning

I’ve almost finished a first draft of the track layout for Demondrille. The good news is that it seems to fit in the space I have, despite the fact that I have to compromise on the minimum curve radius. If I was running a point to point this wouldn’t be necessary, but to fit the whole thing in, I’d have to create two point-to-point layouts. I don’t think this would work for me operationally, so to accommodate a loop arrangement, I need curve radii down to about 25 inches. This allows me to model the prototype gradients and to have a staging yard on a lower level.


Overall, I’m stoked with the layout. I am able to reproduce every line, loop and turnout that existed circa 1955. It will be great to operate (I will need help, guys!).

I only have two concerns:

• It really will be train room; there won’t be much room for the things currently in there – my modelling bench, paint booth, tool box etc. Is this really a problem? I’ll just have to find clever solutions to work around the layout. Access into the room and to the other spaces (under the house for example) will also need to be modified.

• I like the look of the railway in the landscape. In this layout, there is a lot of track; it might look too busy and lose the special appeal Demondrille had of an elaborate steam-era facility in the middle of nowhere. This is something I will have to watch out for.

Why not choose somewhere different then?

Well, I have a passion for this place; I’m not sure anywhere else (or anywhere simpler to model, anyway; all the other places I like would be even more complicated) would sustain my interest to see it through. I wanted to find out about it and model it in its entirety from the first time I stumbled across the place. Railway modelling love at first sight, perhaps!

Anyway, it's a hobby; at the end of the day there's no wrong answer if I'm having fun.

I was there again yesterday; first time in a while that I ventured down to Demondrille south. To my surprise, the vehicular track is in pretty good shape and goes as far as the distant signal beyond Demondrille South. It must have been renewed and used a fair bit during the concrete resleepering and resignalling work.


In this picture, the road is on what were the transfer sidings, with the down goods dive on the left of frame, with the main lines beyond that. Further on, the “road” goes right along what was the Up Goods line, which seems a bit insulting.

Here are a couple of other photos where the southern junctions used to be; not much evidence left now.

This one is looking in the down direction from the approximate location of South Box.

This one is at the approximate location of the southern junction (see the picture on the cover of Trackside 3:


I’m very lucky that I photographed the remains of the facility while much of it was in place; now there is very little left, and what is left is overgrown and/or inaccessible. Those hundreds of photographs, mostly taken in the early 90s, are really going to come in handy!

Certainly going to be a fun ride building this one!
Monday, 23 December 2013

Layout planning with 3rdPlanIt

With a few days off over Christmas, I've been learning 3rdPlanIt to lay-out the plan for the train room. Although I haven't mastered it yet, it seems to be easier to use than Templot, which I tried previously, and more capable, being able to represent terrain and even benchwork.
Some time ago, I bought a power hack-saw, but it's been in the box since then. Recently I got around to assembling it and cutting up some aluminium angle for the next modules. I can fit about 6 1.8m long modules in the room in a rectangular shape. Because Demondrille yard was on a grade of 1 in 75, i can make use of the grade to include a fiddle yard under the higher Sydney-end.

Merry Christmas!

Dear reader
I hope that you have a peaceful and happy Christmas and a productive, modelling-filled 2014. I also hope that Santa brings you a few goodies for the layout!
Cheers
James

Saturday, 5 October 2013

A great day...

Hi again,

Had a great day today, combining some family time with a visit to the Sydney Model Railway Exhibition. This exhibition really seems to get bigger every year, and it is not possible to see everything thorougly, particularly with two children in tow. So I focused on the important retail stands. I didn't spend too long at any of the exhibits, but the Wallerawang and Binalong layouts looked good, as well as the Lego "outback Australia" layout - very clever and creative and popular with the kids.

The crowd grew quickly after 10am and many of the usual suspects were spotted. Exhibitions (and most railway enthusiast happenings) do sometimes feel like some sort of live "Embarassing Bodies" event with the higher than average concentration of ageing men in anoraks and desert boots who look and smell like they could do with a good wash. But it did strike me that, for the time I have been in this hobby and the size of the crowd there, how relatively few I know well.

The rtr models are generally getting better and better. I was persuaded by Oscar Deluca to buy some SDS BCW wagons, which I had previously felt were a bit outside my era. But he was right - they are probably the most accurate and detailed NSW prototype ready to run models we have had to date. Anyway, I want to run a 48 class eventually so a BCW or three won't be out of place.

With the glut of rtr models, it's hardly worth building kits anymore, but rather than regret this, I now feel that I can concentrate on being the Traffic and Way and Works Branches, rather than spend my modelling time being a rolling stock supplier. For the time poor, this is not such a bad thing.

I also picked up some SDS Tulloch 10,000 gal tank cars, some Austrain 1915 CVs and a twin pack of Austrains FOs. Even these are very impressive, ready fitted with internal carriage lighting. I had intended to pick up some of the Trainorama MRCs, but the "pinstriped" sides, representing the tongue-and-groove timber cladding, is overdone. A bit disappointing; it's probably otherwise a fine model.

For a bit of colour, here is a shot from the Wombat Road bridge at Demondrille, taken last week.
Happy modelling!

Friday, 4 October 2013

Still here...

Mainly because of a new job and some extra business travel, I didn't get much time to model in the past year or so, much less to blog about it.  But I've come out the other side and have started working on Kingsvale again, keen to get it finished so that I can start on my life's work - Demondrille!

Last week I spent a few days following the Main South to Junee, Wagga Wagga, Culcairn, following the branch to Corowa and down to Seymour to visit the Heritage Centre there.  Came back through Albury, Rand, Henty, Cootamundra and home.  Found a few trains to chase and the weather was great.  Despite the ever-dwindling steam-era infrastructure, I had lots of fun and took lots of photos.

My next step with Kingsvale is the point rodding.  I have started on this, but it's more complicated than first thought.  But I have it figured out now and will post some photos soon.

Looking forward to Liverpool tomorrow, surely the modelling highlight of the year!
Cheers
James

Wednesday, 22 August 2012

Colour and light

The landscaping continues, and by doing a few hours a week, things are progressing nicely.

As this is the first significant landscaping job I've done on a model railway since I was a kid, I'm surprised about just how forgiving it is.  If the colour is wrong, you can go over it, sand it back, repaint it, whatever; but nearly any mistake can be rectified.

For best effect, landscaping progresses in layers and stages.  Using a several excellent references and a number of materials, the photos show where I've got to.  No area is finished yet, but you can see that some areas are close.


Two significant additions are the static grass applicator, which I made for under $35 following the instructions at http://csxdixieline.blogspot.com/2010/06/howto-static-grass-applicator.html  I tried it out today and it worked a treat.  This is surprising, because rarely do I find that something I have wired up first-go works.  In this photo, the area in the foreground has been landscaped with static grass.


Secondly, I scratchbuilt a rail-rack and gang shed.  Again, there are some excellent references available to help the modeller obtain an accurate and authentic result.  I recommend Branchline Modeller 1, and in particular Jim Longworth's article "A Desktop History of Gang Sheds in NSW" in ARHS Bulletin, May 1999, pp172ff.

I purchased a UNEEK rail rack, but was disappointed to find that it seems to be cast from a Code 100 rail master.  So it doesn't have that spindly look of the prototype, which would be made from much lighter rail.  So I scratchbuilt one from Code 55 rail, again with reference to the article in Branchline Modeller 1.  I'm happy with the result so far.  It needs a bit of dry brushing to highlight the detail. 

Further to my previous post, the gang shed appeared to be painted in medium stone, which James McInerney pointed out was little used after 1954 (Thanks James!).  Also, as Tom pointed out to me, (thanks Tom!) the latest Country Branch Lines book, which features the Blayney-Cowra cross-country line shows other gang sheds on the line painted the same colour.  So confident that the gang shed was medium stone in 1953, that it what I've painted it.  I've started weathering by giving it a couple of thin black washes which has settled nicely into the corrugations and around hinges and latches.

I've also given the station building a once-over to tone down the pristine medium stone and give it that slightly faded look.  The clapboard has been accentuated with a couple of washes of thin matt black humbrol enamel.


After painting with acrylics, the cutting on the northern end of the yard has been generously covered with red dust (from Chucks).  The prototype is a pinker red rather than this orange tint, but it's the base coat- I will work in some other flock and drip on some diluted acrylic to add some natural variation. 


Also, there are quite a few weeds growing in the cutting, as the recent photo below shows.


This view of the eastern face of the cutting clearly shows the variation in colour, particularly from the top to the bottom.


I am in the process of adding long grass and weeds using the process described in Barry Norman's Wild Swan book on modelling landscapes.  This involves bleaching carpet underlay fibres, glueing them in clumps and combing out the loose fibres before colouring with watercolours.  Hopefully, I will have some pictures of that next time.